Caulking FAQ
What are the main types of sealants used in professional construction?
Contractors typically use the following:
- Silicone Sealants (The Gold Standard for Movement & Longevity):
- Strengths: Unmatched movement capability (often ±50% to +100% -50%), exceptional UV stability (won’t chalk, yellow, or crack from sun exposure), extreme temperature resistance (-40°C to +150°C and beyond), excellent waterproof performance, and superior long-term durability (20-50+ years). They offer robust adhesion to non-porous materials like glass, metal, and glazed surfaces, often without a primer as well as porous substrates like concrete or brick. Ideal for critical building envelope joints, curtain walls, structural glazing, expansion joints, and anywhere maximum weatherproofing and longevity are paramount.
- Considerations: Generally not paintable, can be more challenging to remove, and may require specific primers for certain substrates.
- Polyurethane (PU) Sealants (For Toughness & Paintability):
- Strengths: Excellent abrasion and tear resistance, very good adhesion to porous materials like concrete and masonry (with or without a primer), and typically paintable. They offer good overall durability and are often used in high-traffic areas (e.g., control joints in concrete slabs) or where a tough, durable, and paintable seal is required, such as exterior perimeter sealing of windows and doors.
- Considerations: Can be susceptible to UV degradation (chalking, yellowing, hardening) over time, generally have lower movement capability than silicones, and some formulations may be prone to bubbling on porous substrates.
- Silyl-Modified Polymer (SMP) / MS Polymer Sealants (The Versatile Hybrid):
- Strengths: A hybrid chemistry that combines benefits of both silicones and polyurethanes. They offer good UV stability (better than PUs, though generally not quite as high as silicones), are often paintable, and exhibit excellent adhesion to a wide array of substrates (both porous and non-porous), often primerless. They have good movement capability and are less prone to bubbling than many polyurethanes. Ideal as a versatile, multi-purpose sealant for many general construction joints, window/door perimeter sealing, and areas where a balance of performance and paintability is needed.
- Considerations: Can be higher in cost than PUs and may not match the extreme temperature range, strength or ultimate UV resistance of pure silicones.
- Acrylic Latex (Painter’s Caulk) Sealants (For Basic Interior Finishing):
- Strengths: Water-based, easy to apply and clean up with water, and highly paintable (often immediately or within a few hours). They offer good adhesion to common porous surfaces like wood, drywall, and plaster. They are cost-effective for non-moving interior gaps and minor cracks where a paintable finish is desired.
- Considerations: Very limited flexibility and movement capability, poor water resistance for sustained exposure, and susceptible to cracking and shrinking over time, especially in dynamic joints. Not suitable for exterior or high-movement applications. Primarily used for cosmetic finishing around trim, baseboards, and window/door frames indoors.
- Butyl Rubber Sealants (For Water Impenetrability & Concealed Joints):
- Strengths: Known for their excellent water impermeability and strong adhesion. Highly effective for concealed joints, lapped materials, roofing, and other areas where a highly resilient and water-tight seal is critical but high joint movement is not expected. They retain flexibility and resist water vapor transmission.
- Considerations: Limited movement capability, may not be paintable, can be difficult to tool and clean, and typically have a shorter service life in exposed applications compared to other high-performance sealants.
What are the primary performance criteria professional contractors prioritize when selecting any sealant for a commercial project?
Beyond simply filling a gap, professional contractors evaluate sealants based on a rigorous set of performance criteria:
- Movement Capability (Joint Movement): Crucial for accommodating thermal expansion/contraction and building settlement. This is expressed as a percentage (e.g., ±25%, ±50%) of the initial joint size and indicates the sealant’s elasticity.
- Adhesive Strength: The sealant’s ability to form a durable bond to a wide range of substrates (concrete, masonry, metal, glass, plastics, EIFS) without bond failure. Priming requirements are a key consideration.
- Durability & Longevity: Resistance to environmental factors like UV radiation, ozone, extreme temperatures, and chemical exposure, directly impacting service life and warranty.
- Cure Characteristics: Tack-free time, full cure time, and the impact of ambient conditions (temperature, humidity) on the curing process.
- Workability & Tooling: Ease of application, non-sag properties, ability to be tooled cleanly, and resistance to dirt pick-up.
- Paintability/Stainability: Whether the sealant can be painted over and if it will stain or bleed into adjacent substrates.
- VOC Compliance: Adherence to local and regional Volatile Organic Compound regulations (e.g., LEED, SCAQMD) for indoor air quality and environmental responsibility.
- Compatibility: With adjacent building materials, coatings, and other sealants within the system.
- Specific Resistances: Such as fire rating, mildew resistance, or fuel/chemical resistance for specialized applications.
What are the most common causes of sealant failure on professional construction sites, and how can they be effectively mitigated across different sealant types?
Sealant failures lead to costly call-backs and compromise building integrity. Key issues and solutions include:
- Adhesive Failure (Delamination):
- Cause: Improper surface preparation (dust, oils, moisture, form release agents), incompatible substrates, or inadequate/missing primer.
- Mitigation: Crucial for all sealants, especially silicones. Adhere rigorously to manufacturer’s surface preparation guidelines (clean, dry, sound). Perform solvent wipes (e.g., IPA, Xylene) for non-porous surfaces for silicones. Conduct field adhesion tests on project-specific substrates to verify bond strength.
- Cohesive Failure (Splitting within the bead):
- Cause: Sealant’s internal strength is insufficient for the joint movement; incorrect joint design (e.g., too thin).
- Mitigation: Select a sealant with adequate movement capability (silicones excel here). Ensure proper joint geometry (width-to-depth ratio, typically 2:1) and utilize a backer rod to prevent three-sided adhesion.
- Bubbling/Blistering:
- Cause: Trapped moisture, outgassing from porous substrates (common with polyurethanes, less with silicones), or rapid skinning in high humidity/temperature.
- Mitigation: Ensure surfaces are completely dry. For porous materials, use a breathable backer rod or a non-gassing primer. Apply sealants during recommended temperature windows and avoid direct sun on hot substrates.
- UV Degradation/Discoloration:
- Cause: Exposure to sunlight causing chalking, yellowing, or cracking.
- Mitigation: Specify UV-stable sealants like silicones, aliphatic polyurethanes or high-grade SMPs for all exterior exposed joints. Aromatic polyurethanes should be painted if UV exposure is a concern.
- Incompatible Materials:
- Cause: Sealant reacting negatively with adjacent materials (e.g., plasticizers migrating from asphaltic materials into sealants, causing softening or discoloration; acetoxy cure silicones reacting with sensitive metals).
- Mitigation: Always confirm sealant compatibility with all adjacent building materials. Consult manufacturer technical data sheets and conduct test patches if unsure. Neutral cure silicones are generally preferred for broader compatibility.
Why do many professionals prefer silicone for demanding jobs?
When is silicone not the best choice?
- When the sealant needs to be painted — polyurethanes, acrylics or hybrids are better.
- On asphalt or bituminous surfaces, where chemical incompatibility can occur, except for specialized silicones e.g. Dowsil 890SL.
- When bonding to porous surfaces without primer, hybrids or PU will adhere better than an acetoxy silicone. Neutral-cure silicones are recommended for porous substrates.
Can one sealant type handle all jobsite needs?
Not efficiently. Professional contractors should keep a core range of sealants:
- Silicone – Primary exterior/weatherproofing and wet-area product.
- Polyurethane – High-adhesion bonding to concrete or masonry.
- Hybrid – General-purpose, paintable applications.
- Acrylic latex – Budget-friendly trim or drywall applications.
How critical is surface preparation for optimal sealant performance in commercial applications, and what are the universal best practices?
Surface preparation is the single most critical factor influencing sealant adhesion and longevity. No sealant, regardless of its chemistry, will perform as intended without proper surface prep.Universal Best Practices:
- Cleanliness: Remove all dirt, dust, grease, oils, form release agents, curing compounds, paint, wax, and old sealant.
- Dryness: The substrate must be completely dry. Any moisture at the bond line will compromise adhesion and cure.
- Soundness: The substrate must be structurally sound, cohesive, and free of loose or spalling material. Grind or abrade as necessary.
- Backer Rod Installation: Always install a properly sized backer rod (typically 25% larger than the joint width) to control sealant depth, prevent three-sided adhesion (which limits sealant movement), and provide a tooling surface.
- Priming (As Required): Consult the sealant manufacturer’s TDS for specific primer requirements for different substrates. Primers enhance adhesion, especially on porous or challenging surfaces.
- Masking: Use painter’s tape to create crisp, clean lines and protect adjacent surfaces, especially when working with high-tack sealants like silicones and polyurethanes. Remove tape immediately after tooling.
- Temperature & Humidity: Ensure substrate and ambient conditions are within the manufacturer’s recommended range for application and cure.
What specific considerations are vital for the proper tooling and finishing of sealant beads to ensure both aesthetics and long-term performance?
Proper tooling is an art and a science, ensuring both visual appeal and functional integrity:
- Timely Tooling: Tool the sealant immediately after application, before a skin begins to form. This is particularly critical for fast-curing sealants.
- Full Contact: Tooling forces the sealant into intimate contact with both joint walls and the backer rod, eliminating air voids and ensuring robust, uniform adhesion.
- Optimal Bead Profile: Aim for a slightly concave (coved) bead. This shape allows the sealant to achieve maximum elongation and compression during joint movement without overstressing the bond line. Avoid flat or convex beads.
- Minimize Tooling Agents: If using a tooling aid, apply it sparingly. Excess can compromise adhesion, stain substrates, or attract dirt. Always verify compatibility with the sealant manufacturer. For silicones, clean, lint-free tools with no tooling liquid are often preferred.
- Consistent Pressure & Speed: Apply firm, consistent pressure and move the tooling tool at a steady speed to create a uniform, smooth bead.
- Cleanup: Remove masking tape immediately after tooling and before the sealant fully skins over. Promptly clean any excess sealant or tooling residue from adjacent surfaces with an appropriate solvent (xylene or IPA typically) before it cures.
Beyond product choice, what overarching factors contribute to the overall success and longevity of sealant installations on a professional project?
Sealant performance is a system, not just a product. Success depends on:
- Detailed Joint Design: Proper sizing of joints based on anticipated movement, material coefficients of thermal expansion, and the sealant’s movement capability.
- Quality Workmanship: Proper training and experienced applicators who understand preparation, application techniques, and tooling.
- Environmental Conditions: Applying sealants within the manufacturer’s recommended temperature and humidity ranges. Avoiding application on frozen, wet, or excessively hot substrates.
- Substrate Compatibility: Thoroughly vetting the chemical compatibility of the chosen sealant with all adjacent materials it will contact, including primers, coatings, and other sealants.
- Manufacturer Support & Warranties: Partnering with manufacturers who provide robust technical support, comprehensive data sheets, and meaningful warranties for their products.
- Regular Inspection & Maintenance: Educating building owners on the importance of periodic inspection and timely repair/reapplication to maximize the lifespan of the sealant system.
By meticulously addressing these factors, professional contractors ensure that sealant installations deliver maximum performance and contribute significantly to the long-term durability and energy efficiency of the structure.
Firestopping: A Professional Contractor's FAQ
Firestopping isn’t just about filling holes; it’s about life safety, property protection, and rigorous compliance. For professional contractors, understanding firestop systems, their application, and the complex codes that govern them is absolutely non-negotiable. This FAQ addresses key considerations for ensuring safe, compliant, and effective firestop installations.
What is firestopping, and why is it so critical in commercial construction?
Firestopping is the process of sealing penetrations and gaps in fire-rated walls or floors to maintain their fire resistance ratings. When pipes, conduits, cables, or ductwork pass through these fire-rated assemblies, they create openings that could allow the rapid spread of fire, smoke, and toxic gases.
Firestopping is critical for several reasons:
- Life Safety: It compartmentalizes a building, slowing the spread of fire and smoke. This provides occupants more time to safely evacuate and allows emergency responders more time to act.
- Property Protection: By limiting fire spread, it minimizes damage to property and reduces potential financial losses.
- Code Compliance: It’s a non-negotiable requirement of building codes (e.g. NBCC, OBC, IBC or NFPA). Non-compliant firestopping can lead to project delays, failed inspections, costly rework, and significant legal liabilities.
- System Integrity: It restores the fire rating of the breached assembly, with a 3rd party tested firestop assembly, ensuring the entire passive fire protection system functions as designed.
What are the primary types of firestop products and their mechanisms, and how are they generally applied?
Firestop products come in various forms, utilizing different mechanisms to achieve their fire-resistive properties, and each is designed for specific applications and conditions:
-
- Sealants/Caulks: These are compounds applied into annular spaces around penetrating items or into linear gaps. They form a robust seal and can operate through several mechanisms:
- Intumescent: These sealants contain chemicals that expand and char when exposed to heat, creating an insulating barrier that seals the opening. They are often crucial for combustible penetrants (e.g., plastic pipes) as they can expand to fill the void left by melting materials.
- Elastomeric/Non-Intumescent: These sealants form a flexible, durable seal that resists the passage of fire, smoke, and hot gases primarily through their inherent fire resistance and integrity, without significant expansion. They are often used for non-combustible penetrants (e.g., metal pipes) or in dynamic joints where movement is expected.
- Endothermic: These sealants absorb heat and release chemically bound water vapor, which helps cool the fire-exposed surface and prevent heat transfer.
- They come in sausages or cartridges for caulk guns or in pails for larger applications.
- Mortars: Heavier, cementitious compounds mixed with water and poured or troweled into larger openings or for structural applications. They cure to a hard, rigid seal, primarily acting as a physical barrier that resists heat and flame passage. They provide both fire and smoke resistance.
- Wraps/Collars/Bags:
- Wraps/Strips: Flexible, intumescent materials wrapped around combustible pipes (e.g., PVC, CPVC, ABS) where they pass through fire-rated assemblies. When heated, they char and expand inward to crush and seal the melting pipe.
- Collars: Pre-formed intumescent devices that clamp around combustible pipes on one or both sides of the assembly. They function similarly to wraps but offer a quicker, pre-engineered solution.
- Bags/Pillows: Intumescent bags filled with granular material or mineral wool coated with intumescent material, typically used for temporary seals or in large openings with frequent changes (e.g., cable trays). They expand to fill the void when exposed to heat.
- Sealants/Caulks: These are compounds applied into annular spaces around penetrating items or into linear gaps. They form a robust seal and can operate through several mechanisms:
- Blocks/Bricks: Intumescent pre-formed blocks or bricks of intumescent material that are built up like a wall around penetrants in a large opening, similar functionality to bags/pillows but with a different form factor.
- Putties: Non-curing, pliable compounds that are easy to mold and apply around electrical boxes, cables, or small openings. They often intumesce to seal gaps.
- Boards/Devices (Ablative or Intumescent): Pre-fabricated panels or rigid devices designed for specific applications like large opening seals or for through-penetrations in electrical and data rooms.
- Ablative: These materials absorb heat at a controlled rate and erode (ablate) in a predictable way, forming a char that protects the substrate beneath and restricts fire spread.
- Some boards may also incorporate intumescent properties.
What does it mean for a firestop system to be “listed” or “UL/ULC Classified,” and why is this non-negotiable?
A “listed” or “UL/ULC Classified” firestop system means that it has been rigorously tested by a recognized independent third-party testing agency (like Underwriters Laboratories – UL, ULC (Underwriters Laboratory of Canada), Intertek/ETL, or FM Approvals) to meet specific fire resistance standards (e.g., CAN/ULC S115, ASTM E2307, ASTM E814/UL 1479 for through-penetrations, ASTM E1966/UL 2079 for linear joints).
This classification is absolutely non-negotiable because:
- Code Compliance: Building codes mandate the use of listed systems. Using unlisted products or unapproved assemblies is a direct code violation.
- Predictable Performance: Listing ensures the system will perform as expected in a fire scenario, providing the specified F-rating (fire resistance) and T-rating (temperature transmission through the penetration).
- Legal Liability: Contractors are legally responsible for installing firestop systems according to their listings. Deviations can result in severe liability in the event of a fire.
- Insurance Requirements: Code-compliant listed firestop installations are required by most insurance companies.
- Quality Assurance: It provides confidence that the product and assembly meet stringent quality and safety standards.
A listed system specifies all components, including the firestop material, the penetrating item, the construction of the fire-rated barrier, and the exact dimensions (annular space, joint width, material thickness). No deviations are allowed.
How do F-ratings and T-ratings differ, and why are both important for firestop systems?
F-ratings and T-ratings are crucial metrics assigned to listed firestop systems:
- F-Rating (Fire Rating): This measures the duration for which the firestop system prevents the passage of flame and hot gases through a penetration or joint. It indicates the integrity of the seal and its ability to resist direct fire exposure. An F-rating of 2 hours means the system prevented flame passage for at least 2 hours.
- T-Rating (Temperature Rating): This measures the duration for which the firestop system prevents the passage of heat through a penetration or joint. Specifically, it limits the temperature rise on the non-fire side of the assembly to no more than 325°F (180°C) above ambient. A low T-rating is critical to prevent spontaneous combustion of combustible materials on the non-fire side (e.g., wood studs, insulation, cable insulation). The most prominent requirement for a combined F and T Rating (FT Rating) is found in head-of-wall joints. These joints, which occur at the interface between a fire-rated wall and a fire-rated floor or roof assembly, are required by both the NBCC and OBC to be protected by a firestop system that has been tested and listed with both F and T ratings, ensuring not only flame containment but also the limitation of heat transfer.
- In addition to head-of-wall joints, the two other most common scenarios where FT Ratings are explicitly required include:
- Penetrations through firewalls, as defined under Article 3.1.10.1. of the NBCC and OBC — freestanding, structurally independent fire separations used to divide a building into two or more fire compartments. These walls must maintain their fire-resistance rating independently, and any service penetrations must be protected by a system tested to resist both flame and heat transmission.
- Penetrations through the main structural floor slab separating underground parking from the occupied portion of the building above. These penetrations are subject to strict provisions under Part 3 of the Code, particularly where they involve mixed-use occupancies or a change in major occupancy classification between storeys. Firestop systems in these scenarios must provide both F and T Ratings to maintain compartmentation and prevent the rapid transmission of heat into occupied levels.
Why both are important:
- An F-rating prevents the fire from directly spreading.
- A T-rating prevents the fire from igniting materials on the other side due to heat transfer.
- Codes often require both F and T ratings to match the fire-resistance rating of the assembly being penetrated. For example, a 2-hour fire-rated wall often requires a firestop system with both a 2-hour F-rating and a 2-hour T-rating. T-ratings are critical for penetrations involving combustible items (plastic pipes, electrical cables) or when a fire-sensitive area is on the non-fire side. Non-combustible pipes are equally critical as they are often metal, which is an excellent conductor, and can transfer heat from one room to another quite easily, which can cause combustible material on the other side of the partition to ignite spontaneously.
What are common pitfalls or mistakes in firestop installation that professional contractors must avoid?
Even experienced contractors can make costly firestop mistakes. Common pitfalls include:
- Deviating from Listed Systems: This is the most critical mistake. Using a different product, a different penetrating item, an incorrect annular space, or an unapproved wall/floor construction voids the listing. There’s no “close enough” in firestopping.
- Improper Surface Preparation: Failure to clean, prime, or prepare the substrate as per the listing can lead to adhesive failure.
- Incorrect Material Quantity: Using too little material (e.g., insufficient depth of sealant, too few wraps) will compromise the fire rating.
- Damaged or Improper Backer Materials: Using an incorrect type of backer material (e.g., wrong density mineral wool), or damaging it during installation, can affect the system’s performance.
- Inadequate Support for Penetrations: Heavy pipes or conduits not properly supported can stress the firestop seal and lead to cracks or gaps.
- Applying Firestop to Unrated Assemblies: Firestop systems are designed for rated assemblies. Applying them to non-rated walls doesn’t magically make the wall fire-rated.
- Lack of Documentation: Failing to properly document installations (photos, signed inspection tags, completion certificates) can lead to problems during inspections or in post-construction audits.
- Ignoring Dynamic Movement: For expansion joints or areas with significant movement, using a rigid firestop material instead of a flexible one designed for movement will lead to premature failure.
What documentation and quality control measures are essential for firestop installations?
Rigorous documentation and quality control are paramount for firestopping:
- Pre-Installation Planning:
- Review Drawings & Specifications: Identify all fire-rated assemblies and required firestop locations.
- Access Manufacturer Data: Obtain and review the specific UL/ULC/ETL/FM listing numbers, installation instructions, and Material Safety Data Sheets (MSDS/SDS) for all specified firestop products.
- Verify Approved Methods: Ensure the penetrations match the exact conditions of a listed system (e.g., pipe material, size, annular space, assembly type).
- During Installation:
- Dedicated, Trained Installers: Use personnel specifically trained and, ideally, certified in firestop installation.
- Strict Adherence to Listings: Install every firestop system precisely as per its UL/ULC/ETL/FM design details.
- Photo Documentation: Take clear, timestamped photos of installations before they’re covered up, showing the product, penetration, and surrounding assembly.
- Firestop Tags: Apply permanent, legible firestop tags to each firestopped penetration, indicating the design number, date, and installer.
- Post-Installation & Inspection:
- Third-Party Inspections: Engage third-party special inspectors (mandated in many jurisdictions) to verify compliance. While firestop manufacturers rigorously test and publish detailed solutions, it is important to recognize that they are also product suppliers with a commercial interest in the outcome of a project. As such, they do not qualify as independent third parties under building code requirements or industry best practices. To ensure objectivity, protect against liability, and maintain code compliance, inspections should always be conducted by a qualified and certified third-party agency that has no financial stake in the materials used or the outcome of the installation.
- Completion Certificates: Provide detailed documentation for the building owner and authorities having jurisdiction (AHJ), including product data sheets, listed design numbers, and installation logs.
- Punch List & Remediation: Promptly address any deficiencies identified during inspections.
Proper documentation proves that work was done correctly, protecting the contractor and the building owner, and is essential for gaining occupancy permits.
Backer Rods: Professional Contractor's FAQ for Optimal Sealant Performance
Backer rod, though often overlooked, is a critical component in virtually every sealant joint. Its correct selection and installation are paramount for achieving durable, high-performance sealant bonds and maximizing the lifespan of the entire joint system. This FAQ addresses key questions professional contractors may have about backer rods.
What is the primary purpose of a backer rod in a sealant joint, and why is it so critical for professional applications?
Backer rod serves several essential functions, making it indispensable for proper sealant installation and long-term joint performance:
- Controls Sealant Depth: It ensures the sealant is applied at the optimal width-to-depth ratio (typically 2:1 for most high-performance sealants like silicones and polyurethanes). This allows the sealant to stretch and compress effectively across the joint, preventing it from being too thick (which limits movement) or too thin (which leads to premature failure).
- Prevents Three-Sided Adhesion: By preventing the sealant from bonding to the back of the joint, the backer rod allows the sealant to flex freely as the joint expands and contracts. Adhesion on three sides severely restricts movement capability and leads to cohesive failure (splitting) or adhesive failure (detachment) of the sealant.
- Provides a Firm Tooling Surface: It offers a uniform, non-adhering surface against which the sealant can be tooled, ensuring a consistent and aesthetically pleasing bead profile.
- Conserves Sealant Material: By filling the void behind the sealant, it reduces the amount of expensive sealant required, leading to cost savings on large projects.
- Aids in Proper Curing: For moisture-curing sealants (like most silicones and polyurethanes), certain backer rod types can allow moisture vapour to reach the back of the sealant, facilitating a complete and uniform cure.
What are the main types of backer rods available, and how do their properties influence their selection for different projects?
The primary types of backer rods are distinguished by their cell structure and composition, and understanding these differences is crucial for optimal sealant performance and avoiding common failures:
- 1. Closed-Cell Backer Rod:
- Composition: Made of non-absorbent foam (e.g., polyethylene or polyolefin) with discrete, sealed cells of gas (typically air or nitrogen).
- Properties: Inherently non-absorbent to water and moisture, provides a firm support, and in its intact state, is considered non-gassing. This means it won’t continuously release internal gases into the curing sealant.
- Critical Nuance for Outgassing: It’s vital to understand that if a closed-cell backer rod is punctured, torn, or severely over-compressed during installation, these sealed gas cells can rupture. When this happens, the trapped gas can escape into the wet sealant, potentially causing bubbling or blistering as the sealant cures. This is why careful installation with blunt tools is paramount.
- Ideal Applications:
- Exterior joints or wet areas: Where preventing moisture intrusion from the back of the joint is crucial (e.g., window perimeters, shower stalls).
- Vertical or overhead joints: Its firmer consistency provides excellent support for the sealant bead and prevents sag.
- When minimizing outgassing from the backer rod itself is critical: Especially important for sealants like silicones and some polyurethanes that are sensitive to gas release, provided the backer rod remains uncompromised.
- 2. Hybrid Backer Rod (Open-Cell Core with Closed-Cell Skin):
- Composition: Features a soft, open-cell foam core encased in a durable, closed-cell polyethylene skin.
- Properties: Offers a unique combination of benefits. The closed-cell skin provides a non-absorbent, non-gassing surface directly to the sealant, preventing water absorption into the rod’s core and eliminating the risk of bubbling from gas release from the rod’s core itself. The open-cell core maintains the rod’s flexibility and compressibility, making it easy to install and conform to irregular joints.
- Clarifications:
- Vapour Transmission: While the closed-cell skin directly facing the sealant acts as a vapour barrier at that interface, the open-cell core remains permeable. This means the hybrid rod does not create a complete vapour block behind the skin, allowing some moisture vapour from the underlying substrate to move within the joint assembly, which can be beneficial for the cure of moisture-sensitive sealants by creating a more balanced moisture environment. However, direct vapour transmission through the skin to the sealant is limited.
- Cost: Hybrid backer rods are generally considered a premium product due to their dual material composition and manufacturing complexity. Their cost typically falls above standard closed-cell polyethylene rods, reflecting their advanced properties.
- Ideal Applications:
- Versatile use: Suitable for a wide range of applications where a balance of excellent weather resistance (from the skin) and good workability (from the soft, compressible core) is desired.
- Demanding building envelope joints: Where the sealant needs a clean, stable, non-gassing surface to bond to, but the backer rod also needs to accommodate significant joint movement without putting undue stress on the sealant.
- 3. Open-Cell Backer Rod:
- Composition: Made of absorbent foam (e.g., polyurethane) with an interconnected cell structure.
- Properties: Absorbent to water, softer, and allows moisture vapour and air to pass through its structure. This “breathability” means it will allow outgassing from the substrate to pass through it, potentially causing bubbles in the sealant if the substrate itself is outgassing.
- Ideal Applications:
- Moisture-curing sealants (e.g., some silicones, polyurethanes) in deep or inaccessible joints: Where ambient moisture from the back of the joint is needed to facilitate a complete and uniform cure, as it allows moisture vapour to reach the sealant.
- Interior joints: Where water absorption is less of a concern and its softer nature can conform well to irregular joint shapes.
- When a softer, more compressible material is needed: Ideal for irregularly shaped joints or when minimal stress on joint edges during installation is desired.
- Firestop applications: Some open-cell backer rods are specifically designed as part of fire-rated systems.
How do I determine the correct size of backer rod for a specific joint, and what happens if it’s incorrectly sized?
Correct sizing is crucial for optimal performance:
- General Rule: The backer rod should be approximately 25% larger than the joint width. For example, for a 1-inch wide joint, use a 1-1/4 inch backer rod.
- Installation Method: It should be installed by compressing it into the joint, creating a tight friction fit without overstretching or puncturing it.
- Consequences of Incorrect Sizing:
- Too Small: If the backer rod is too small, it won’t create the necessary bond breaker or provide adequate support, leading to improper sealant depth, or sealant sag.
- Too Large: If it’s too large, it can be difficult to install without tearing or puncturing. Over-compression can create excessive outward pressure, leading to “hourglassing” of the sealant (a narrow waist), which concentrates stress and can cause premature failure. It can also cause the backer rod to “mushroom” out, affecting the sealant’s bond area.
Can a backer rod be compromised during installation, and what steps should be taken to prevent damage?
Yes, backer rods can be compromised during installation, which can directly lead to sealant failure and compromise the integrity of the joint system:
- Punctures or Tears (Especially for Closed-Cell): Using sharp tools (like utility knives or screwdrivers) or forcing an oversized backer rod can puncture or tear the skin of a closed-cell backer rod. When the sealed cells are ruptured, the trapped gases (typically air or nitrogen) can escape into the wet, curing sealant. This release of gas is the primary cause of bubbling or blistering in the sealant bead, particularly for sensitive chemistries like silicones. Additionally, a damaged skin can interfere with its non-adhering properties, potentially leading to three-sided adhesion if the sealant bonds to the compromised core.
- Overstretching: Stretching the backer rod excessively during installation can reduce its effective diameter and density. This prevents it from creating the necessary friction fit, providing proper support, or acting as an effective bond breaker, ultimately compromising the sealant’s movement capability.
- Contamination: Getting dirt, dust, grease, oils, or incompatible materials on the backer rod can negatively affect the sealant’s adhesion to the joint substrate, or even interfere with the sealant’s cure.
Prevention is key to avoiding these issues:
- Use Proper Tools: Always use blunt-edged, rounded, or specially designed backer rod insertion tools. Your thumb or a blunt putty knife are often effective.
- Avoid Sharp Objects: Never use utility knives, screwdrivers, or other sharp tools to push or prod the backer rod into place.
- Select Correct Size: Ensure the backer rod is sized appropriately (approximately 25% larger than the joint width) to achieve a snug friction fit without excessive force.
- Handle Carefully: Handle backer rods with clean hands or gloves to prevent contamination.
- Proper Storage: Store backer rods in a clean, dry environment, protected from physical damage and extreme temperatures, to maintain their integrity.
- Smooth Installation: Uncoil and cut backer rod neatly, avoiding kinks or twists, to ensure uniform placement within the joint.
What are the risks of omitting a backer rod or using an inappropriate substitute in a sealant joint?
Omitting or substituting the backer rod with unsuitable materials significantly compromises the sealant joint:
- Three-Sided Adhesion: This is the most common and detrimental consequence. The sealant bonds to the back of the joint, inhibiting its ability to move freely and leading to premature splitting or detachment.
- Improper Sealant Depth: Without a backer rod, it’s impossible to consistently control the sealant depth, resulting in either too much material (reduced movement, higher cost) or too little (insufficient strength).
- Increased Sealant Consumption: More sealant is used than necessary, leading to increased material costs and potentially longer cure times.
- Poor Aesthetics: An uneven or inconsistent bead profile due to lack of a firm tooling surface.
- Reduced Durability & Lifespan: The joint will fail prematurely, leading to water intrusion, air leakage, and costly callbacks.
- Warranty Voidance: Most sealant manufacturers’ warranties are voided if the sealant is not installed over a compatible backer rod.
- Inappropriate Substitutes: Using materials like sand, gravel, wood, or inconsistent packaging materials as substitutes will not provide the necessary bond-breaking, compressibility, or support, leading to guaranteed failure.
What sizes does backer rod come in?
Backer rod is available in diameters typically ranging from 1/4″ to 6″ (6 mm to 150 mm). The rod should be 25% larger than the joint width to ensure it stays in place without adhesive.
Can backer rod be used in horizontal and vertical joints?
Yes. It’s commonly used in both:
- Horizontal: Expansion joints in sidewalks, parking decks, floors. Commonly closed-cell backer rod would be installed in exterior horizontal joints to prevent the possibility of water absorption and subsequent potential freezing, which would compromise the sealant on top.
- Vertical: Curtain walls, precast panels, tilt-up walls, window perimeters.
Make sure it’s properly seated without stretching or over-compressing.
Concrete Restoration: Contractor’s FAQ
What is the difference between concrete repair and concrete restoration?
Repair addresses a localized defect such as a crack, spall, or delamination.
Restoration is a system-based process that identifies the mechanisms causing deterioration, repairs affected areas, and implements protective measures to slow or stop future damage. Restoration is intended to extend service life, not simply restore appearance.
| Repair vs. Restoration (Quick Reference)
Concrete repair addresses localized defects. |
What causes concrete deterioration?
Concrete deterioration typically results from one or more of the following mechanisms:
- Reinforcing steel corrosion due to chloride ingress (road salts, marine exposure) or carbonation
- Water ingress through cracks, failed joints, or deteriorated waterproofing systems
- Freeze–thaw damage in saturated concrete with inadequate air entrainment
- Alkali–silica reaction (ASR), causing internal expansion and cracking
- Construction deficiencies such as inadequate cover, poor consolidation, or improper curing
- Chemical attack from de-icing salts, acids, or industrial contaminants
- Structural movement or overloading leading to cracking and spalling
How is the cause of deterioration confirmed?
A condition survey is used to confirm which deterioration mechanisms are active and to determine severity. This typically includes:
- Visual inspection for cracking, spalling, rust staining, and efflorescence
- Sounding or hammer testing to locate delaminations
- Corrosion potential testing or half-cell mapping
- Core sampling and laboratory analysis (chlorides, carbonation depth, strength)
The purpose of testing is not simply to document damage, but to identify the underlying cause so the repair strategy addresses the problem rather than the symptom.
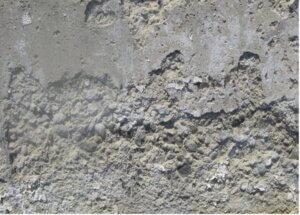
What surface preparation is required before repair?
All unsound or contaminated concrete must be removed to expose sound substrate. Surfaces should be prepared to the specified ICRI Concrete Surface Profile (CSP), typically CSP 5–9 for bonded repairs.


Reinforcing steel must be exposed where corrosion is present, and all bond-inhibiting materials — including curing compounds, coatings, adhesives, and membrane residues — must be removed.
Most cement-based repair mortars require a saturated surface-dry (SSD) substrate at placement. Surface preparation requirements vary by product and must always follow the manufacturer’s technical data sheet.
| Compatibility Does Not Mean Adhesion
Material compatibility does not guarantee adhesion. Bond depends on surface preparation, cleanliness, moisture condition, and correct material selection. |
How should reinforcing steel corrosion be addressed in patch repairs?
Corroded reinforcing steel must be cleaned to bright metal. Where section loss exceeds allowable limits, supplemental reinforcement or splicing must be designed by the structural engineer.
Repair boundaries should extend beyond visibly damaged concrete to reach low-chloride, uncarbonated concrete. Corrosion mitigation measures — such as protective primers, inhibitors, or galvanic anodes — should be considered to reduce future corrosion adjacent to the repair.
When should epoxy injection be used versus polyurethane injection?
- Epoxy injection is used for structural repair of dry, non-moving cracks where restoring load transfer is required. It is rigid and unsuitable for cracks subject to movement or moisture.
- Polyurethane injection is used to seal leaking or moving cracks. It remains flexible and is intended for waterproofing rather than structural repair. Polyurethane injection of cracks is sometimes referred to as “waterstop”.
What types of concrete repair mortars are used in restoration?
- Polymer-modified cementitious repair mortars:Cement-based repair materials enhanced with polymer modifiers, either dry-blended into the powder or added as a liquid latex. These are the industry standard for modern concrete restoration, offering improved bond strength, reduced shrinkage, and enhanced freeze–thaw durability. They are used for most structural, vertical, overhead, and general repair applications.
- Epoxy-based repair mortars:Resin-based systems providing very high bond strength and chemical resistance. Because they are rigid and moisture-sensitive, their use is typically limited to specialized applications where movement is minimal.
Vertical and overhead repairs require non-sag, thixotropic formulations designed to stay in place during placement.
In modern concrete restoration, most professional repair mortars commonly described as “cementitious” are actually polymer-modified cementitious repair mortars. Plain cement-only patch materials are generally unsuitable for durable structural repairs in most applications. Polymer modification may be supplied as a dry-blended powder or as a liquid latex added during mixing.